- If the new cartridge is a new photo cartridge, remove it from its storage unit.
- Remove the sticker and transparent tape from the bottom of the cartridge.
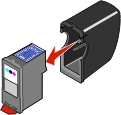

| Warning: | Do not touch the gold contact area on the cartridges. |
When you install new cartridges for the first time during setup of the All-In-One, follow the instructions on the Setup sheet that comes with the All-In-One.
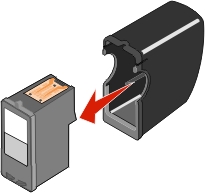
After setup, you may need to install only one cartridge at a time to replace an empty cartridge, or to install a cartridge when swapping the photo and black cartridges.
| Warning: | Do not touch the gold contact area on the cartridges. |
When swapping the photo cartridge and the black cartridge:
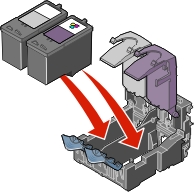
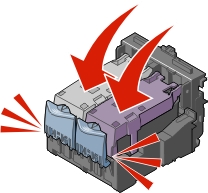
Depending on the part numbers you use, the color of the cartridge tops may vary.
| Note: | You can print with either a color cartridge and a black cartridge or with a color cartridge and a photo cartridge. Extend the life of the color cartridge and improve printing speed by installing a black or photo cartridge along with the color cartridge. |
You can also follow the steps to change cartridges from the control panel. For more information, see Performing maintenance tasks from the control panel.