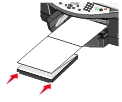
Loading plain paper into the paper tray
Loading specialty paper into the paper tray
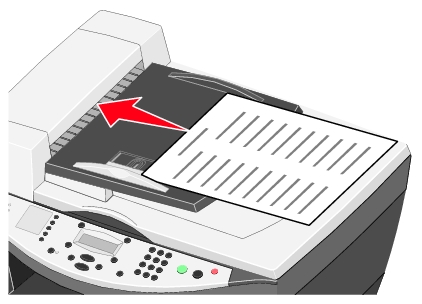
Loading an original document face up into the ADF
Loading an original document face down on the scanner glass
The basic functions of your All-In-One are copy, fax, scan and print. First, learn how to load paper.
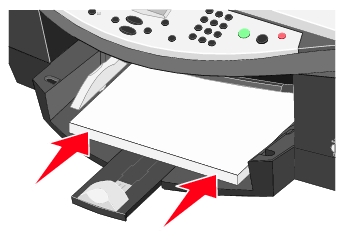
Loading plain paper into the paper tray
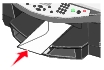
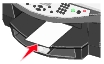
- Lift the paper exit tray and extend the paper guide.
- Insert paper.
Note: If you are using paper with a specific print side, such as photo paper, transparencies, and so on, load paper with the print side facing down. For help, see Loading specialty paper into the paper tray.
- Slide the paper guides to rest against the left and right edges and bottom of the paper.
- Lower the paper exit tray, and then extend the paper exit tray stop to catch the paper as it exits the All-In-One.
Loading specialty paper into the paper tray
|
Load up to
|
Make sure
|
|
150 sheets of plain paper
|
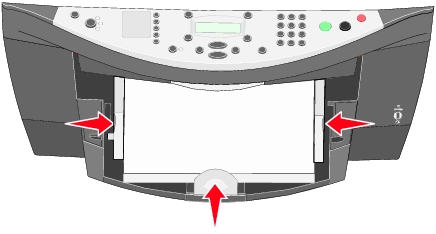
- The paper is centered in the paper tray.
- The paper guides rest against the right and left edges and bottom edge of the paper.
Note: To load letterhead, make sure the front of the letterhead faces down, and feed the top of the letterhead into the All-In-One first.
|
|
15 envelopes
|
-
 The print side of the envelopes faces down, as shown.
 - The envelopes are centered in the paper tray.
- The paper guides rest against the right and left edges and bottom edge of the envelopes.
- You choose to print the envelope with Landscape orientation.
- You select the correct envelope size.
Select the next biggest size if the exact envelope size is not listed, and set the left and right margins so that your envelope text will be correctly positioned on the envelope.
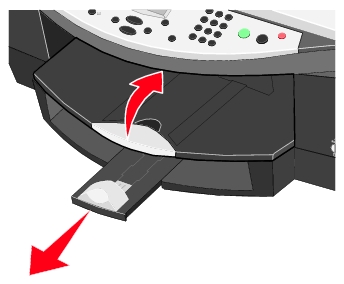
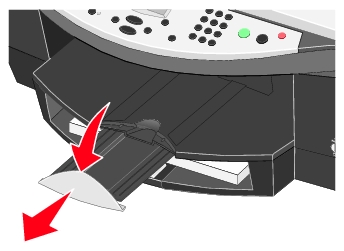
Note: To load a single envelope, place the envelope in the specialty paper guides located in the paper exit tray, as shown .
|
|
35 greeting cards, index cards, postcards, or photo cards
|
- The print side of the cards faces down.
- The cards are centered in the paper tray.
- The paper guides rest against the right and left edges and bottom edge of the cards.
Note: To load a single card, place the card in the specialty paper guides located in the paper exit tray, as shown.
|
|
75 sheets of coated, photo, or glossy paper
|
- The glossy or coated side of the paper faces down.
- The paper is centered in the paper tray.
- The paper guides rest against the right and left edges and bottom edge of the paper.
Note: For best results, insert a plain sheet of paper underneath your stack of coated, photo, or glossy paper.
|
|
75 transparencies
|
- The rough side of the transparencies faces down.
- The transparencies are centered in the paper tray.
- The paper guides rest against the right and left edges and bottom edge of the transparencies.
Note: You can load a single transparency into the paper tray without removing plain paper.
|
|
150 sheets of custom size paper
|
- The print side of the paper faces down.
- Your paper size fits within these dimensions:
Width
Length
- 127-432 mm
- 5.0-17.0 inches
- The paper is centered in the paper tray.
- The paper guides rest against the right and left edges and bottom edge of the paper.
|
|
25 iron-on transfers
|
- You follow the loading instructions on the iron-on transfer packaging.
- The print side of the transfers faces down.
- The transfers are centered in the paper tray.
- The paper guides rest against the right and left edges and bottom edge of the transfers.
|
|
150 sheets of letterhead paper
|
- The front of the letterhead faces down.
- The top of the letterhead feeds into the All-In-One first.
- The paper guides rest against the right and left edges and bottom edge of the paper.
|
|
35 sheets of labels
|
- The print side of the labels faces down.
- The top of the labels feeds into the All-In-One first.
- The paper guides rest against the right and left edges and bottom edge of the labels.
|
|
20 sheets of banner paper
|
-
 You remove all paper from the paper tray before loading the banner paper.
 - You tear off only the number of pages needed to print your banner.
- The print side of the banner faces down into the paper tray with the first page of the banner on top.
- The leading edge of the banner paper is going into the printer.
- The paper guides rest against the right and left edges of the paper.
- You have selected the correct paper size for your banner in Print Properties. For help, see Using Print Properties.
|
Note: The paper exit tray can hold up to 50 sheets of paper.
Loading an original document face up into the ADF
You can load up to 50 sheets of your original document (text side up) into the ADF for scanning, copying, and faxing. The ADF is recommended for loading multiple-page documents.
Note: Do not load postcards, photo cards, photo paper, or small images in the ADF. Place these items on the scanner glass face down in the upper left corner.
Note: The paper exit tray can hold up to 50 sheets of paper.
Paper guidelines for the ADF
|
Load up to
|
Make sure
|
- 50 sheets of letter size paper
- 50 sheets of A4 size paper
- 50 sheets of legal size paper
|
- The document is loaded text side up.
- The paper guide is against the edge of the paper.
|
|
50 sheets of custom size paper
|
- The document is loaded text side up.
- The paper guide is against the edge of the paper.
- Your paper size fits within these dimensions:
Width
- 210.0 mm-215.9 mm
- 8.27 in.-8.5 in.
Length
- 279.4 mm-355.6 mm
- 11.0 in.-14.0 in.
|
- 50 sheets of two-, three-, or four-hole pre-punched media
- 50 sheets of edge-reinforced three-hole copier media
|
- The document is loaded text side up.
- The paper guide is against the edge of the paper.
- Your paper size fits within the dimensions allowable.
|
|
50 sheets of preprinted forms and letterhead media
|
- The document is loaded text side up.
- The paper guide is against the edge of the paper.
- Your paper size fits within the dimensions allowable.
- You choose a media that absorbs ink well.
- You allow the preprinted media to dry thoroughly before use in the ADF.
- You do not use media printed with metallic ink particles in the ADF.
- You avoid embossed designs.
|
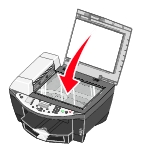
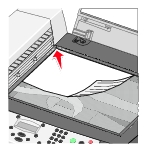
Loading an original document face down on the scanner glass
- Open the top cover.
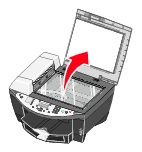
- Place the top of the original document face down on the scanner glass in the upper left corner.
- Close the top cover.