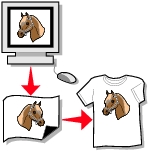
Print iron-on transfers
Aside from the common designs printed on iron-on transfers, you can also print designs that cover the entire iron-on transfer. From your software application, begin by setting the margins to zero, and then adjust the image on screen so that it covers the entire page.
- Load iron-on transfers.
- Customize the settings in the Page Setup dialog.
- From the software application, choose File
 Page Setup....
- From the Format for pop-up menu, choose 810 Series.
- From the Settings pop-up menu, choose Page Attributes.
- Choose a paper size. If you are printing borderless iron-on transfers, make sure you select a paper size among the Paper sizes supported in borderless printing.
- Select an orientation.
- Click OK.
- Customize the settings in the Print dialog.
- From the software application, choose File Print....
- From the Printer pop-up menu, choose 810 Series.
- From the pop-up menu in the upper left corner, choose Quality & Media.
- From the Paper Type pop-up menu, choose Iron-On Transfer. Choosing Iron-On Transfer automatically mirrors the image you want to print.
- Select a print quality other than Quick Print. Normal is the default.
- Click Print.
To prevent smudging, remove each iron-on transfer as it exits the printer, and then let it dry before stacking.
Related topics
Print